Neumorphic Effect In Flutter App Container Widget

flutter neumorphic effect containers

Let’s understand step by step of how to achieve the neumorphic effect in flutter containers, but first if you are new and want a complete setup and want to build your first app instantly, then click here, now let’s jump directly into our topic.

Introduction: Neumorphic Effect In Flutter

As we have learnt so far, is that containers have only an outside shadow, if you want to know how to customize a container then click here. Using neumorphic, we can give it even an inside shadow, we can control the direction, color etc. Let’s understand it now:

Installation

flutter_neumorphic: ^3.2.0

You need to use this package and it is the latest version. Of course, you can search for this package in pub.dev as well. Write this line inside your pubspec.yaml file dependencies section. Then run pub get to import the package in your app.

Neumorphic 

SafeArea(

      child: Scaffold(

          body: Center(

        child: Neumorphic(

          child: Container(

            height: 100,

            width: 100,

            color: Colors.white,

          ),

        ),

      )),

    )
Let’s understand it step by step:
  1. Define scaffold.
  2. Use its body constructor and give it a center child so the content will be shown in the center of the screen.
  3. As we can see, the container is defined here with some width and height, and having a white background color.
  4. Let’s wrap this container with neumorphic class and see how the container will look now.
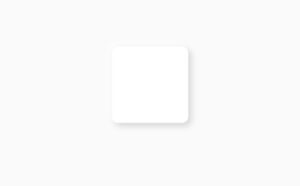
 

flutter neumorphic container flutter app 3

As you can see, the container is dropping a shadow, which we haven’t defined in the container decoration class. This shadow comes from the neumorphic class. Let’s now customize our neumorphic class to see all the other hidden features that this class possess.

Neumorphic Style

 style: NeumorphicStyle()
Using the style constructor of neumorphic class, we can now make modifications to our container.

Depth

 style: NeumorphicStyle(depth: -4)
We have used the depth cosntructor of neumorphic style class, giving it a negative value results in giving the container an inside shadow and giving it a positive results in the outside shadow like a container box shadow does. In this example, we have used a negative, so let’s see how our container will look right now:

flutter neumorphic container flutter app 6

Light Source

 lightSource: LightSource.bottomRight
Using the light source constructor, we can specify from which direction will the light come, its top left by default, but we have modified it to bottom right, you can also use top, right, left etc. and see how the container looks after that. Let’s see our container now:

flutter neumorphic container flutter app 5

Neumorphic Box Shape

 boxShape: NeumorphicBoxShape.circle()
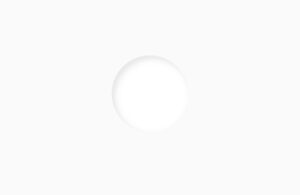
Using the box shape constructor of neumorphic style class, we can specify the shape of the neumorphic. We have used the circle method from neumorphic box shape class. Let’s see whether our container looks circular after using it:

flutter neumorphic container flutter app 4

Intensity

intensity: .9
Use the intensity constructor to make the intensity soft or hard of the shadow. Use values between 0 and 1, means 0.4, 0.5 etc. We have given it a .9. Now let’s see how it looks now:

flutter neumorphic container flutter app 9

Disable Depth

disableDepth: true
By using the disable depth constructor, we can disable the shadow effect. It does not care whether the depth is inward or outward. It has been disabled for all. You can enable it but making this Boolean value false or just remove the statement. It’s by default is set to false. Let’s see our container now:

flutter neumorphic container flutter app 8

Shadow Dark Color Emboss

shadowDarkColorEmboss: Colors.green
By using this constructor, we can change the color of the shadow where the light source come from. Let’s see it:

flutter neumorphic container flutter app 7

Shadow Light Color Emboss

shadowLightColorEmboss: Colors.green
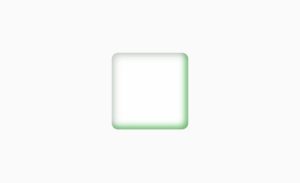
By using this constructor, we can change the color of the shadow which is in opposite direction from the light source. You can use both shadow light color emboss and shadow dark color emboss or even give them different colors to see what outcomes you get. Let’s see what effect shadow light color emboss has made on our container:

flutter neumorphic container flutter app 10

Opposite Shadow Light Source

oppositeShadowLightSource: true
We can set this constructor to true, which by default is false, and we will see that the light is now coming from opposite direction.

Draw Surface Above Child

 drawSurfaceAboveChild: false
It is by default true, when you make it false, then of course if we have a depth let’s day -3 then it will not show because the neumorphic is below the container surface and container have it’s own white color, so the neumorphic effect will be hidden behind container but if you have a positive depth let’s say 5 then it will be shown. Reason is that it spreads even at larger extent than the area a container has covered. Let’s see it now with negative depth:

flutter neumorphic container flutter app 11

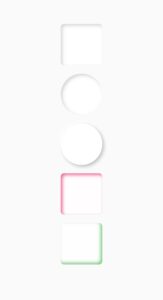
Some Designs Of Neumorphic Effect

flutter neumorphic container flutter app 1

Scaffold(

          body: Center(

        child: Column(

          mainAxisAlignment: MainAxisAlignment.center,

          children: [

            Neumorphic(

              style: NeumorphicStyle(

                depth: -4,

                intensity: .9,

              ),

              child: Container(

                height: 100,

                width: 100,

                color: Colors.white,

              ),

            ),

            SizedBox(height: 20),

            Neumorphic(

              style: NeumorphicStyle(

                boxShape: NeumorphicBoxShape.circle(),

                depth: 4,

                intensity: .9,

              ),

              child: Container(

                height: 100,

                width: 100,

                color: Colors.white,

              ),

            ),

            SizedBox(height: 20),

            Neumorphic(

              style: NeumorphicStyle(

                shadowDarkColorEmboss: Colors.pink.shade400,

                depth: -4,

                intensity: .9,

              ),

              child: Container(

                height: 100,

                width: 100,

                color: Colors.white,

              ),

            ),

            SizedBox(height: 20),

            Neumorphic(

              style: NeumorphicStyle(

                oppositeShadowLightSource: true,

                shadowDarkColorEmboss: Colors.green.shade400,

                depth: -4,

                intensity: .9,

              ),

              child: Container(

                height: 100,

                width: 100,

                color: Colors.white,

              ),

            ),

          ],

        ),

      )

Click here to learn how to create a beautiful neumorphic Flutter login UI design.
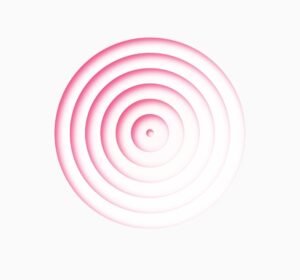
flutter neumorphic container flutter app 2

Conclusion

That’s all for this article, we hope you enjoyed it and have learned how to implement and customize the neumorphic effect in Flutter.

We’d also be glad to see you visit our other tutorials on Flutter app development and Python programming. Thank you for reading this one.
Leave a Comment

Your email address will not be published. Required fields are marked *