In this Flutter tutorial, we’ll practically learn the usage of the Flutter visibility widget. We’ll go through multiple code examples to better understand the features and working of this Flutter widget.
Code for the examples used in this article will also be available in this very article, so you can check them out in case you are stuck somewhere while implementing the visibility widget in your own Flutter app.
Let’s now get started.
What is Flutter Visibility Widget?
This widget is used to show, hide, or replace its child widget. It takes a boolean value which if true, then it’ll show its child widget, and if it is false, then it’ll hide that child widget.
The visibility widget also comes with an additional feature in which you can specify some other widget in case the main widget is hidden or when the visibility is given a false boolean value.
Let’s now understand this concept with the help of practical Flutter code examples.
Implementing Visibility Widget Examples
In our first example, we’ll simply hide and unhide the Flutter widget provided as a child to the Flutter visibility widget. Then, in the second example, we’ll show a new widget in place of the main child widget.
Example 1: Hide/Unhide Widget using Flutter Visibility Widget
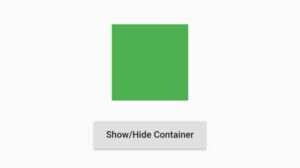
In this example, we’ll create a Flutter container widget and give it some height, width, and background color. See below:
Container(
        height: 100,
        width: 100,
        color: Colors.green,
      )

Visibility(
   child:  // the same above container
 )

Step 1: Boolean variable
bool showItem = false;
Step 2: Material Button
 MaterialButton(
            onPressed: () {
              setState(() {
                showItem=!showItem;
              });
            },
            color: Colors.grey.shade300,
            child: Text('Show/Hide Container'),
          )
Step 3: Visible Constructor
Visibility(
        visible: showItem,
        child:  // same container
)
Testing Phase


Example 2: Replacement in Visibility Widget
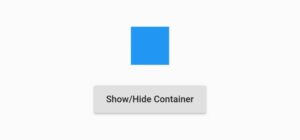
The replacement constructor of the visibility widget is used to show a widget when the visible constructor is set to false. By default, the replacement is set to show a Flutter sized box widget with no size.
In this example, we’ll give it a new container widget. You can give it any Flutter widget of your choice. See below:
 Visibility(
replacement: Container(   // can use some other Flutter widget as well in its place
              height: 50,
              width: 50,
              color: Colors.blue,
              margin: EdgeInsets.only(bottom: 21),
            ),
visible: showItem,
child: // can use same container given in the above examples
)


This is how we can use the Flutter visibility widget. Do share it with other Flutter programmers if you like this tutorial.
Customized Flutter Visibility Widget Source Code
import 'package:flutter/material.dart';
void main() => runApp(MyApp());
class MyApp extends StatelessWidget {
  @override
  Widget build(BuildContext context) {
    return MaterialApp(
      home: VisibilityWidgetExamples(),
    );
  }
}

class VisibilityWidgetExamples extends StatefulWidget {
  const VisibilityWidgetExamples({super.key});
  @override
  State<VisibilityWidgetExamples> createState() =>
      _VisibilityWidgetExamplesState();
}
class _VisibilityWidgetExamplesState extends State<VisibilityWidgetExamples> {

  bool showItem = false;

  @override
  Widget build(BuildContext context) {
    return Scaffold(
      body: Center(
          child: Column(
        mainAxisAlignment: MainAxisAlignment.center,
        children: [

          Visibility(
            visible: showItem,

            child: Container(
              height: 100,
              width: 100,
              color: Colors.green,
              margin: EdgeInsets.only(bottom: 21),
            ),

            replacement: Container(
              height: 50,
              width: 50,
              color: Colors.blue,
              margin: EdgeInsets.only(bottom: 21),
            ),
          ),

          MaterialButton(
            onPressed: () {
              setState(() {
                showItem = !showItem;
              });
            },
            color: Colors.grey.shade300,
            child: Text('Show/Hide Container'),
          )
        ],
      )),
    );
  }
}
Conclusion
In conclusion, we’ve practically discussed how to use the Flutter visibility widget to show/hide its child widget. Also, we’ve learned how to display a custom widget when the visibility is false. Your valuable feedback would be much appreciated.
We’d also be super delighted to see you visit our other tutorials on Flutter app development. Thank you so much for reading this article.
