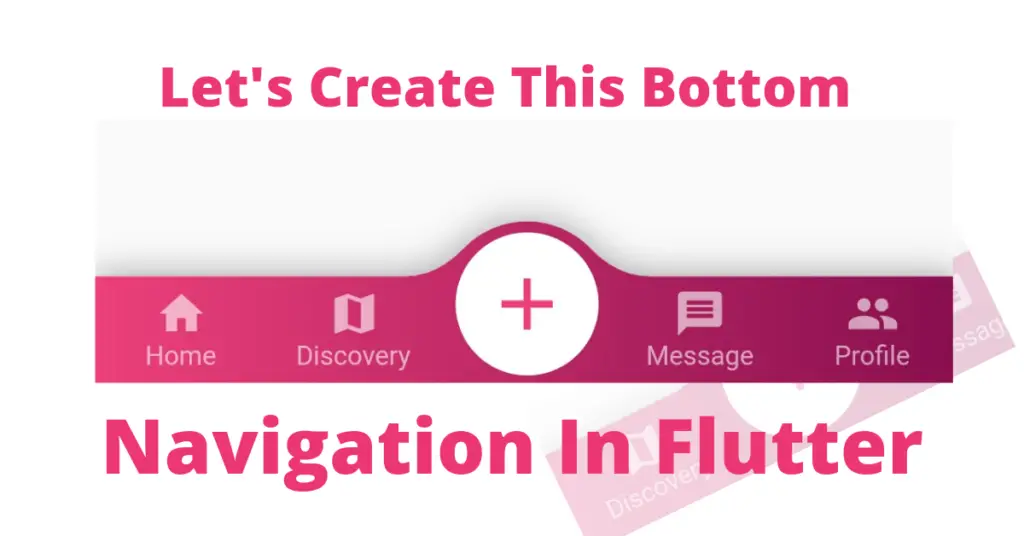
Let’s understand step by step of how to achieve the mentioned bottom navigation bar in flutter app, but first if you are new and want a complete setup and want to build your first app instantly, then click here, now let’s jump directly into our topic.
Introduction: Bottom Navigation Bar In Flutter
As we get many widgets from google flutter, we also get a bottom navigation widget. Its used to navigate using some icons or text, when we click on them, we are navigated to some specific page. This is what this bottom navigation bar is used for. Let’s see now how to implement the mentioned bar.
Installation
convex_bottom_bar: ^3.0.0You need to use this package and it is the latest version. Of course, you can search for this package in pub.dev as well. Write this line inside your pubspec.yaml file dependencies section.

Now run pub get, this package will get installed and now you can use it in your app.
Convex App Bar
Scaffold(
          bottomNavigationBar: ConvexAppBar(
        items: [
          TabItem(icon: Icons.home, title: 'Home'),
          TabItem(icon: Icons.map, title: 'Discovery'),
          TabItem(icon: Icons.add, title: 'Add'),
          TabItem(icon: Icons.message, title: 'Message'),
          TabItem(icon: Icons.people, title: 'Profile'),
        ],
        initialActiveIndex: 2, //optional, default as 0
        onTap: (val) {},
      ))
Items
        items: [
          TabItem(icon: Icons.home, title: 'Home'),
          TabItem(icon: Icons.map, title: 'Discovery'),
          TabItem(icon: Icons.add, title: 'Add'),
          TabItem(icon: Icons.message, title: 'Message'),
          TabItem(icon: Icons.people, title: 'Profile'),
        ],
Initial Active Index
initialActiveIndex: 2, //optional, default as 0
Initial active index constructor specifies which item to focus, currently it is set to 2, means the third item of the list as the list starts from index 0.
On Tap
onTap: (val) {},We also have an on tap constructor which is used to perform actions when a specific item of the list is clicked.
Elevation
elevation: 8
Elevation constructor, as the name defines, it elevates, so by giving it a larger value means the shadow that convex app bar spreads/blurs will increase its extent. Let’s see it now:

Background Color
backgroundColor: Colors.pink.shade400,
Its the color of the convex app bar which by default in flutter app is blue, we can change it by using the background color constructor of convex app bar. Let’s see how it looks now:

Curve Size
curveSize: 200
The curve that you see on the upper border of that bar, we can change it by using the curve size container. Let’s see how it looks now:

Gradient
      gradient: LinearGradient(

          colors: [Colors.pink.shade400, Colors.pink.shade900]
                               )
We can also give our bar a gradient background color by using the gradient constructor. Just pass the linear gradient class and by using its class constructor, we can set the number of colors that we want to pass to our gradient as the color constructor takes a list of colors. Let’s see how our bar is looking after the gradient is added to it:

Height
height: 100

Conclusion
That’s all for this Flutter article, hope you enjoyed it and have learnt a lot from it. Implement it in your code and share your experience with us. There are other constructors of convex app bar as well. We want you to try them and share your experience with us. We would be glad to receive your valuable feedback.
We’d also be glad to see you visit our other tutorials on Flutter app development and Python programming. Thank you for reading this one.
